
Coding Memo
dllexport / dllimport (MSVC) 본문
Dynamic Library (dll) - dllexport / dllimport (MSVC)
__declspec(dllexport)와 __declspec(dllimport)는 MSVC(Microsoft Visaul C++) 컴파일러에서 사용하는 키워드이다. 동적 라이브러리(dynamic library)에서 클래스나 메서드, 변수를 내보내거나 가져올 때 사용된다.
(보통 Windows에서 사용하고, GCC나 Clang에서는 __attribute__((visibility("default"))) 등을 사용)
간단히 말하면, 라이브러리에서 dll을 빌드할 때는 __declspec(dllexport) 키워드를 클래스 이름이나 메서드 원본 앞, 멤버 변수 앞 등에 붙여서 해당 내용을 외부에서 사용하도록 내보내겠다는 의미로 사용한다.
반대로, __declspec(dllimport)는 해당 내용을 이 프로젝트에서 사용할 것이라는 의미로 사용한다.
아래는 예시 코드이다.
#pragma once

#define MY_DLL_EXPORT

#ifdef MY_DLL_EXPORT
#define MY_DLL_API __declspec(dllexport)
#else
#define MY_DLL_API __deslspec(dllimport)
#endif // MY_DLL_EXPORT


class MY_DLL_API Math
{
public:
    static int Add(const int a, const int b) { return a + b; }
    static int Sub(const int a, const int b) { return a - b; }
};
위 코드를 동적 라이브러리 프로젝트에서는 MY_DLL_EXPORT를 선언해주어 __declspec(dllexport)로 사용하면 되고, 라이브러리를 사용하는 프로젝트에서는 이 헤더 파일을 그대로 사용하여 __declspec(dllimport)로 하면 된다.
참고로, dll은 실행파일에 포함되지 않으므로 프로그램을 실행할 때 반드시 필요하다. 동적 라이브러리는 런타임 때 동적으로 로드 된다는 것을 한번 더 기억하자.
(예를 들어, 실행 파일과 그 실행 파일이 사용하는 dll 파일이 같은 경로에 있어야 한다.)
다음은 간단하게 테스트해보는 예시이다.
프로젝트 생성하고 실행해보기
- Dynamic-Link Library (DLL) 프로젝트 생성
PCH(Pre-Compiled Header)도 포함된 프로젝트가 생성된다.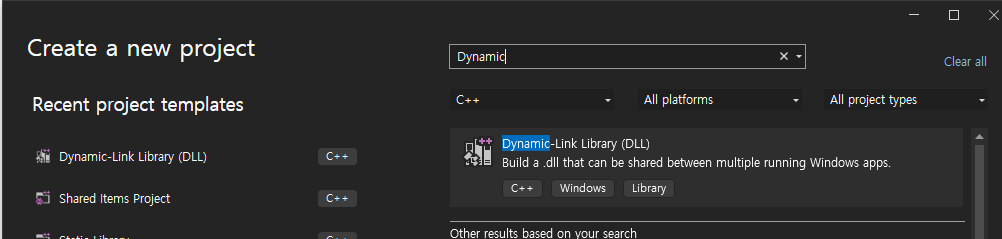
- 생성한 라이브러리를 사용할 프로젝트 생성
'솔루션 탐색기'에서 솔루션 -> 우클릭 -> 새 프로젝트
- 빌드 및 참조 경로 지정
- DLL 프로젝트 속성 - General - Output Directory: 프로젝트 속성 - 일반에서 출력 디렉터리를 지정한다. (여기서는 솔루션 디렉터리에 dll이라는 디렉터리를 만들고 그 위치로 지정했다.)
- DLL을 사용할 프로젝트의 속성 - C/C++ - Additional Include Directories : DLL 프로젝트의 헤더파일이 있는 경로로 지정한다. (여기서 프로젝트 이름이 DllTest이므로, $(SolutionDir)DllTest\로 지정했다.)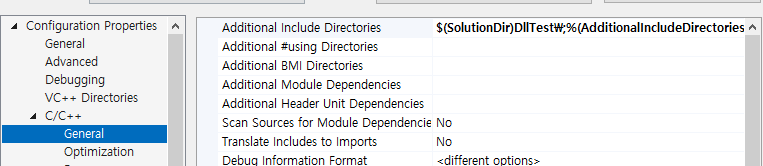
- DLL을 사용할 프로젝트의 속성 - Linker - General - Additional Library Directories: DLL 파일의 경로를 지정 한다. 여기서는 아까 DLL 프로젝트의 Output 디렉터리로 해주면 될 것이다. '$(SolutionDir)dll\$(Configuration)'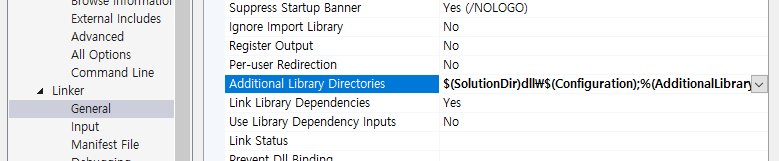
- DLL을 사용할 프로젝트의 속성 - Linker - Input - Additional Dependencies: 해당 라이브러리의 lib파일에 대한 경로를 지정 한다. '$(SolutionDir)dll\$(Configuration)DllTest.lib'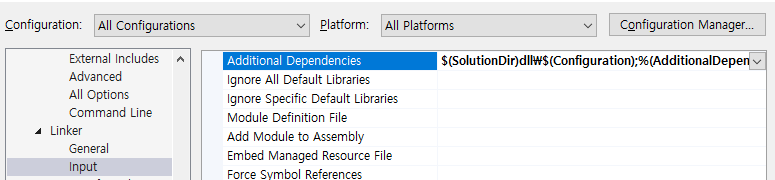
- 라이브러리로 사용할 헤더 작성
MyMath.h
#pragma once #include <iostream> #define MY_DLL_EXPORT #ifdef MY_DLL_EXPORT #define MY_DLL_API __declspec(dllexport) #else #define MY_DLL_API __deslspec(dllimport) #endif // MY_DLL_EXPORT class Math { public: MY_DLL_API static int Add(const int a, const int b) { return a + b; } MY_DLL_API static int Sub(const int a, const int b) { return a - b; } }; class MY_DLL_API MyClass { public: MyClass() : _v(rand() & 1000) {} ~MyClass() {} void Print() const { std::cout << _v << '\n'; } private: int _v; }; - 빌드
빌드 시, dll 파일과 lib 파일 모두 생성되는 것을 알 수 있다.
이 lib 파일은 정적라이브러리가 아니라, Import Library로, DLL이 데이터의 주소를 참조하는데 사용되는 파일이다. 따라서 위 Linker 설정에서 이 파일을 연결해 준 것이다.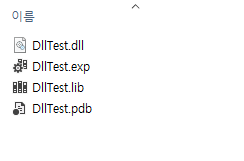
- 코드 작성
#pragma once
#include "MyMath.h"
int main()
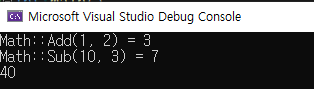
{
auto add = Math::Add(1, 2);
std::cout << "Math::Add(1, 2) = " << add << std::endl;
auto sub = Math::Sub(10, 3);
std::cout << "Math::Sub(10, 3) = " << sub << std::endl;
MyClass obj;
obj.Print();
return 0;
}
7. 결과 확인
'Language > C++' 카테고리의 다른 글
| std::sort와 std::list.sort (1) | 2024.09.26 |
|---|---|
| std::filesystem (0) | 2024.09.19 |
| [winsock] getpeername 호출 시, WSAENOTCONN(10057) 에러 (0) | 2024.05.23 |
| [C++] Concurrent 우선순위 큐 (with lock) (0) | 2024.05.13 |
| const 포인터 캐스팅 (const_cast) (0) | 2024.05.02 |